In the ever-evolving landscape of web development, tools that improve efficiency and enhance the developer experience are indispensable. GitHub Copilot, an AI-powered coding assistant, has revolutionized how developers write code. Combined with the modern web frameworks Qwik and React.js, Copilot can significantly streamline the development process for creating fast, interactive, and scalable web applications.
This blog explores how to leverage Copilot with Qwik and React.js, highlighting practical examples and tips to maximize productivity.
What is Qwik?
Qwik is a next-generation web framework designed to deliver instant-loading web applications by focusing on resumability instead of hydration. Unlike traditional frameworks, Qwik enables applications to load incrementally and execute only the code needed, improving performance metrics like Time-to-Interactive (TTI) and Largest Contentful Paint (LCP).
Key Features of Qwik:
Resumability
One of Qwik’s standout features is its ability to avoid full app hydration. In traditional frameworks, hydration involves re-running JavaScript to “wake up” the application on the client side after the HTML is delivered. This process can be computationally expensive and slow.
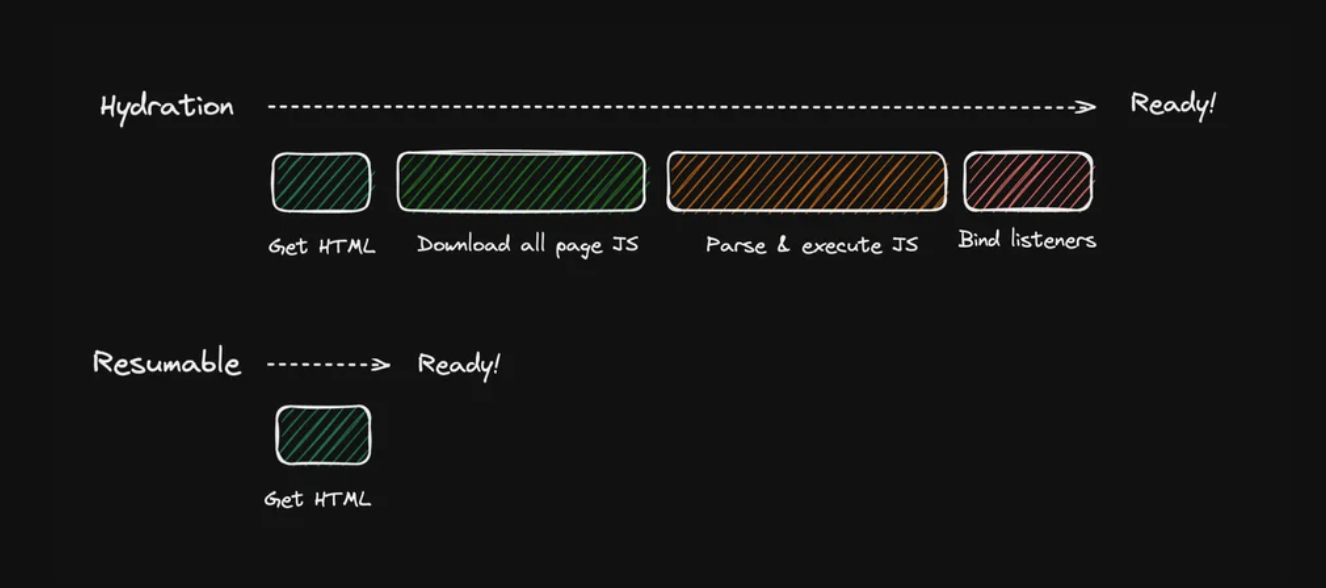
Qwik eliminates this by serializing the application state on the server and “resuming” execution exactly where it left off. This approach drastically reduces unnecessary computation and speeds up the loading process.
Efficient Inline JS Chunk
One of the standout features of Qwik is its approach to handling JavaScript. Unlike traditional frameworks that often ship large, dynamic javascript bundles that increase in size as the application grows, Qwik delivers the first javascript chunk that is remarkably small in size, typically just a few kilobytes.
The beauty of this is that the size of the chunk remains constant, no matter how complex the application becomes. This ensures that initial load time stays fast, providing an exceptional user experience from the very first interaction, without worrying about performance degradation as the application scales. This characteristic is a significant part of Qwik’s unique selling proposition (USP), and it’s a great reason to consider using Qwik for building highly performant web applications.
Optimized Code-Splitting
Qwik’s architecture ensures that only the JavaScript needed for the current interaction is delivered to the browser. This granular approach to code-splitting minimizes the initial load time and improves overall performance.
For example, when a user visits a page, Qwik delivers only the JavaScript required for that specific page or component. Additional scripts are loaded incrementally as the user navigates through the application.
Example Illustration: A user accessing a shopping cart page receives only the code for the cart’s functionality, while the checkout code is deferred until the checkout button is clicked.
SEO-Friendly
Qwik facilitates server-side rendering (SSR), which allows the HTML for a page to be fully rendered on the server before being sent to the client. This approach benefits SEO because search engine crawlers can easily parse the fully rendered content without relying on JavaScript execution.
Additionally, SSR improves performance metrics like First Contentful Paint (FCP), which directly impacts user experience and search rankings.
Example Illustration: Search engines index fully rendered HTML content, ensuring better visibility and ranking for your application.
Why Use Copilot with Qwik and React.js?
Enhanced Developer Workflow
Copilot aids developers by generating code snippets, suggesting functions, and automating repetitive tasks. For frameworks like Qwik and React.js, which involve modular and component-based architectures, Copilot accelerates the creation of boilerplate code and standard structures.
Faster Learning Curve
If you’re new to Qwik, Copilot helps you adapt quickly by providing contextual code suggestions based on established patterns and best practices.
Seamless Integration with Modern Tooling
Using Copilot in IDEs like Visual Studio Code simplifies integrating Qwik and React.js within larger projects, offering tailored solutions to challenges like state management, API integrations, and UI interactions.
Comparison: React vs Qwik (Network and JS Loading)
| Feature | React | Qwik |
| Initial Load | Large Javascript bundle (~500KB – 2MB) | Tiny JS bundle (~100KB or less) |
| Hydration | Hydrates the app after first page load (JS re-runs) | No hydration, app state is resumed directly from HTML |
| Subsequent Navigation | Javascript code is fetched when navigating to new routes (code-splitting) | Only required Javascript is lazily loaded on interaction |
| Javascript Execution | Executes full JS bundle, even for static content | Executes Javascript only when it’s needed (lazy loading) |
| Client-Side Interactivity | Relies on hydration and re-running JS code | Fine-grained reactivity, only interactive parts loaded |
Setting Up Copilot with Qwik + React.js
Prerequisites:
- Node.js is installed on your machine.
- A GitHub Copilot subscription.
- Visual Studio Code (or your preferred IDE).
Steps:
- Install GitHub Copilot Extension:
- Open Visual Studio Code.
- Navigate to the Extensions marketplace.
- Search for “GitHub Copilot” and install it.
Set Up Qwik Project:
npm create qwik@latest my-qwik-app
cd my-qwik-app
npm installCode language: CSS (css)- Integrate React Components: Qwik allows integration with React components using the @builder.io/qwik-react package.
- Run:
npm install @builder.io/qwik-reactCode language: CSS (css)- Activate Copilot:
- Log in to GitHub Copilot through the extension.
- Enable Copilot in the workspace settings.
Practical Example:
Let’s create a simple Qwik app to have a basic understanding about it.
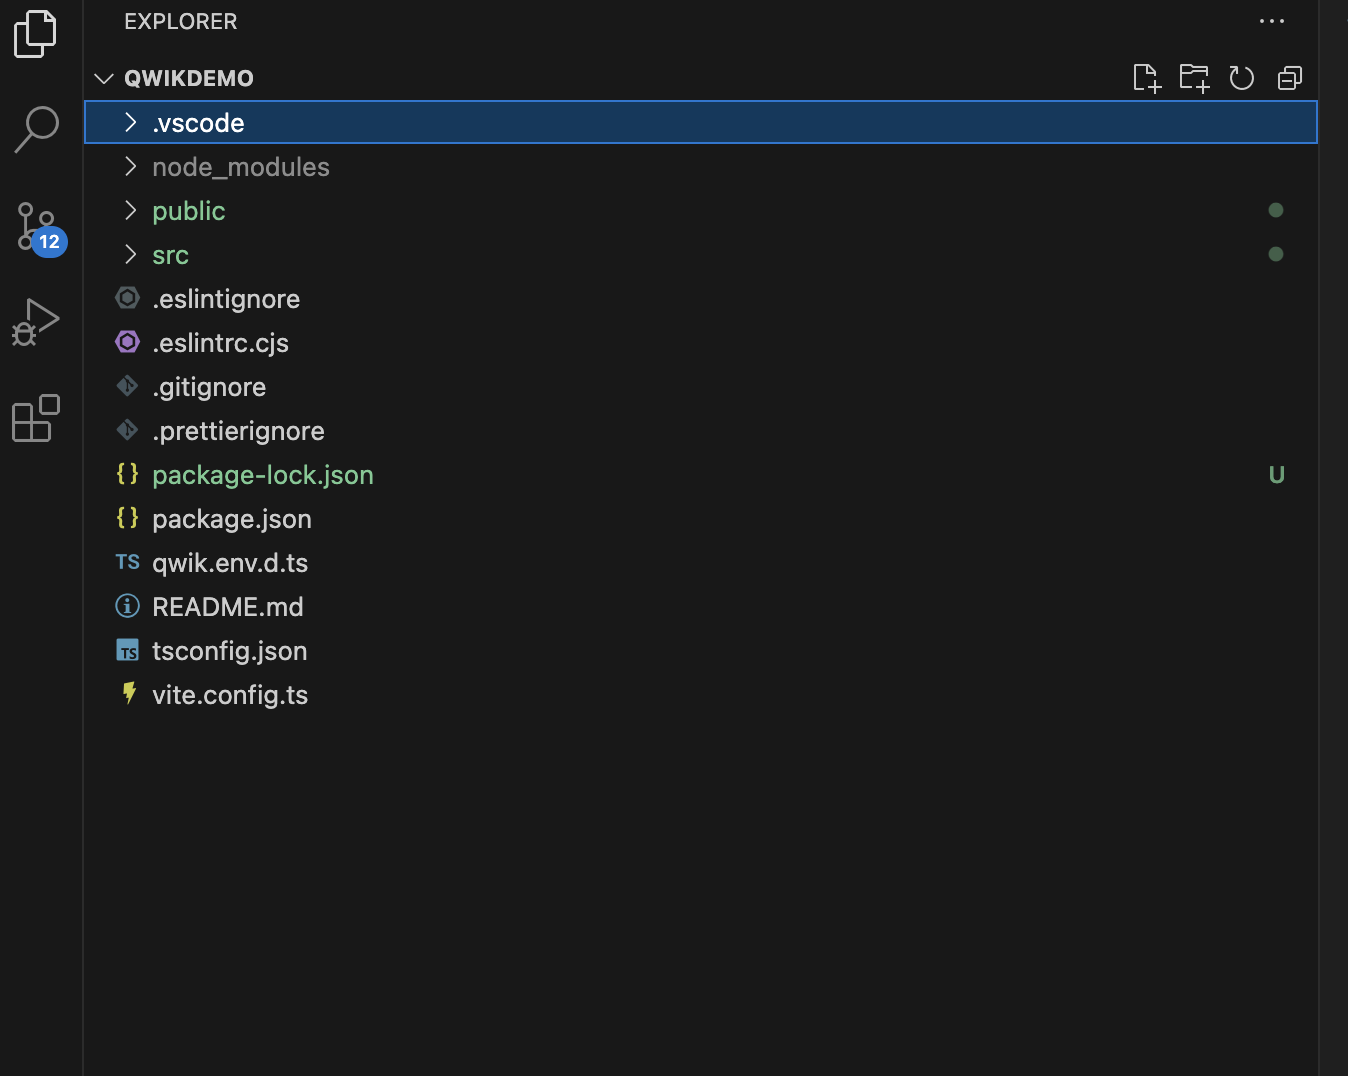
Step 1: After you install the necessary packages and dependencies for empty Qwik app this is how the folder structure would look like
Step 2: Let’s begin modifying the application.
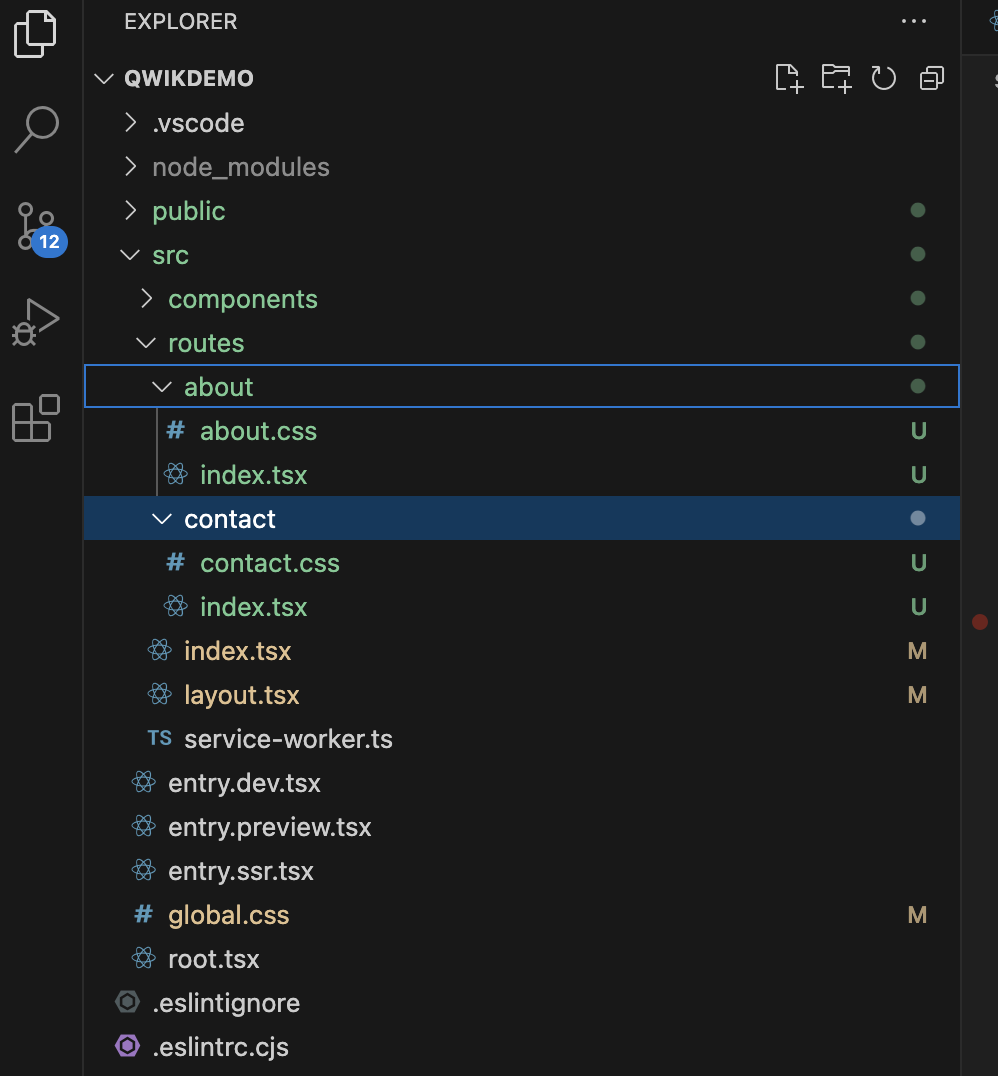
First, create two folders named “about” and “contact” inside the routes folder to create pages for about and contact. In Qwik you can’t simply create files to create routes, first, you have to create a specific route folder and then inside it, the “index” file will correspond to that route.
Also, add .css files for styling purposes.
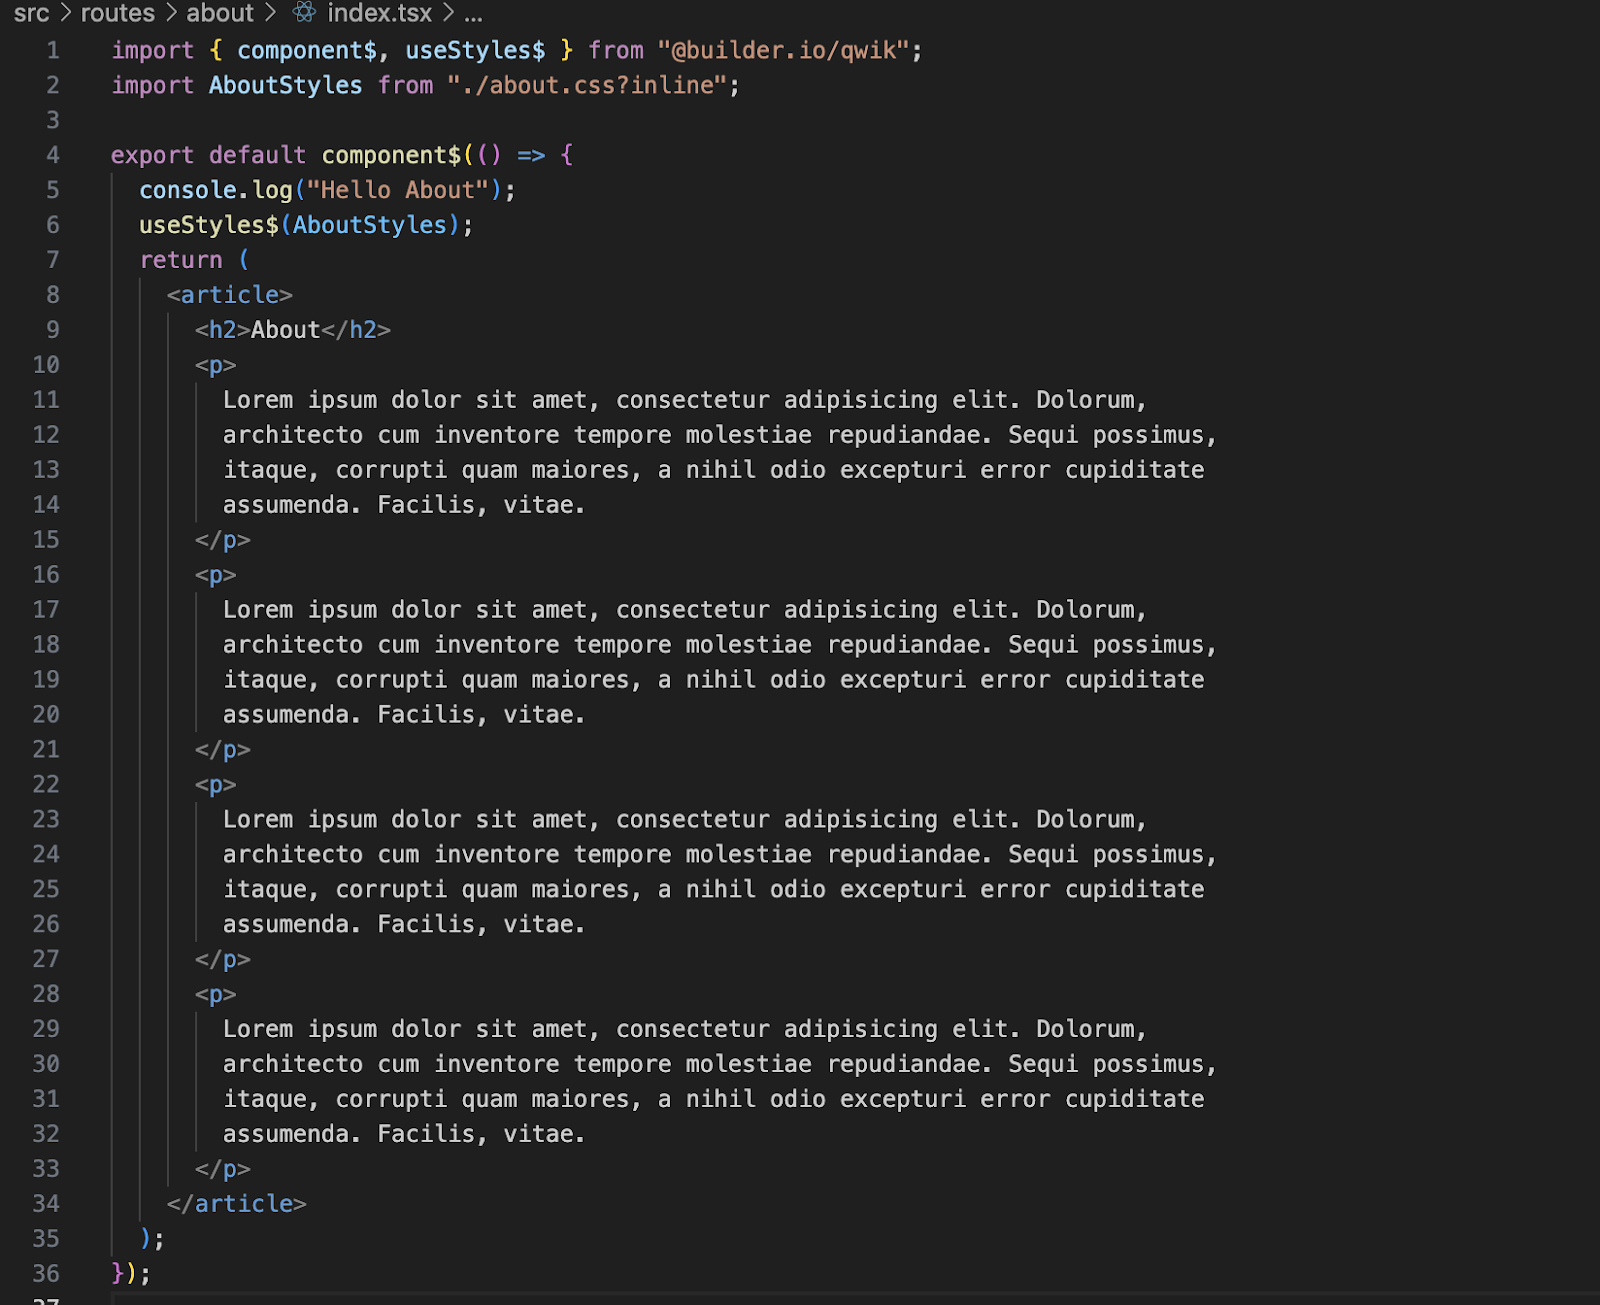
Now let’s change the contents of index.tsx page inside src > routes folder to the image below
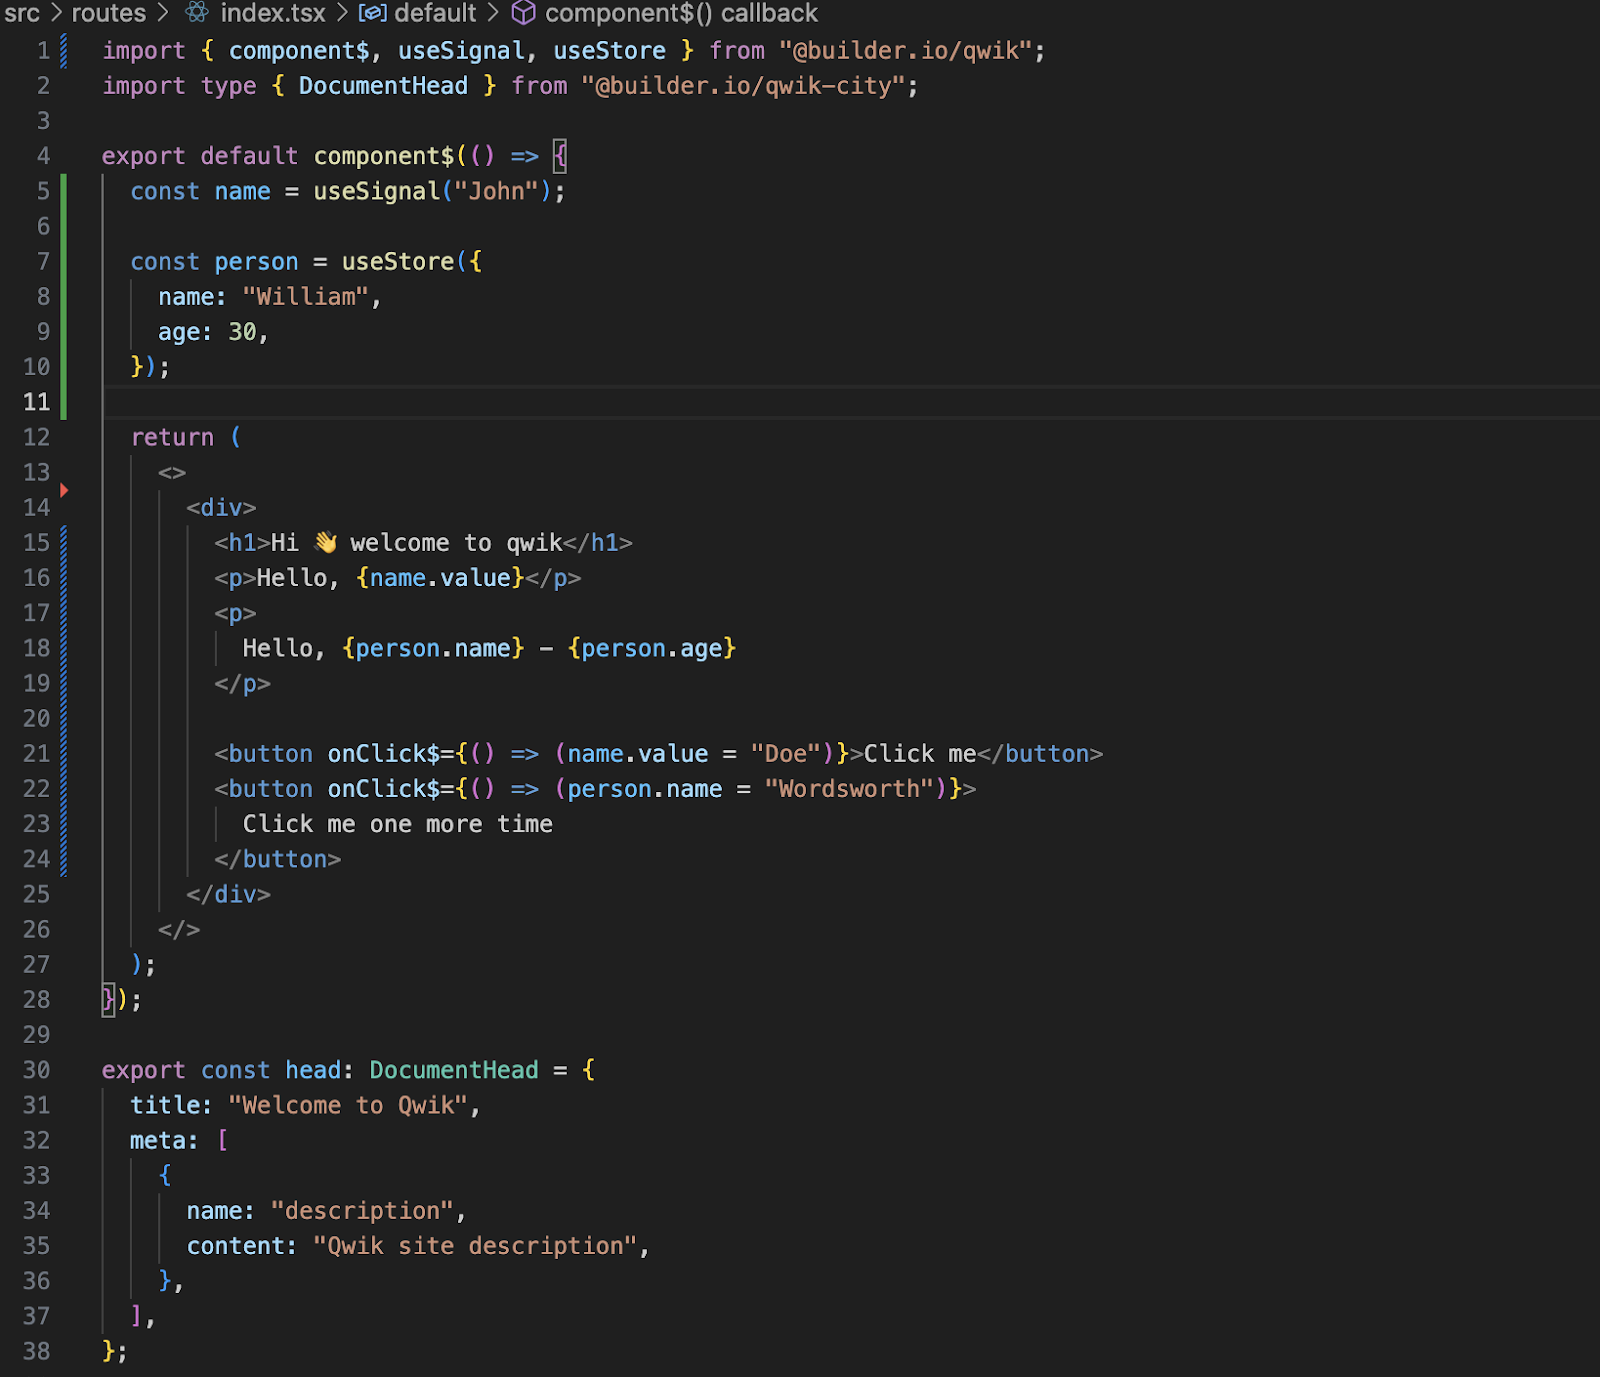
Let’s understand the contents of the file
- First are the import statements for necessary functions and hooks from Qwik.
- From line 4 onwards we are defining the component using the Component$
- The component$ function, marked by the trailing $, enables the Optimizer to split components into separate chunks. This allows each chunk to be loaded independently as needed, rather than loading all components whenever the parent component is loaded.
- NOTE: index.tsx, layout.tsx in routes folder, root.tsx and all entry files need export default. For other components, you can use export const and export function.
- useSignal – Hook that creates a signal that is retained for the lifetime of the component.
- useStore – Creates an object that Qwik can track across serializations.
- To access the value of useSignal you need to use the “value” attribute.
- In the case of useStore you can simply access the value of the object by using the object key.
- onClick$ of the button will allow you to change the value of a person object’s attributes.
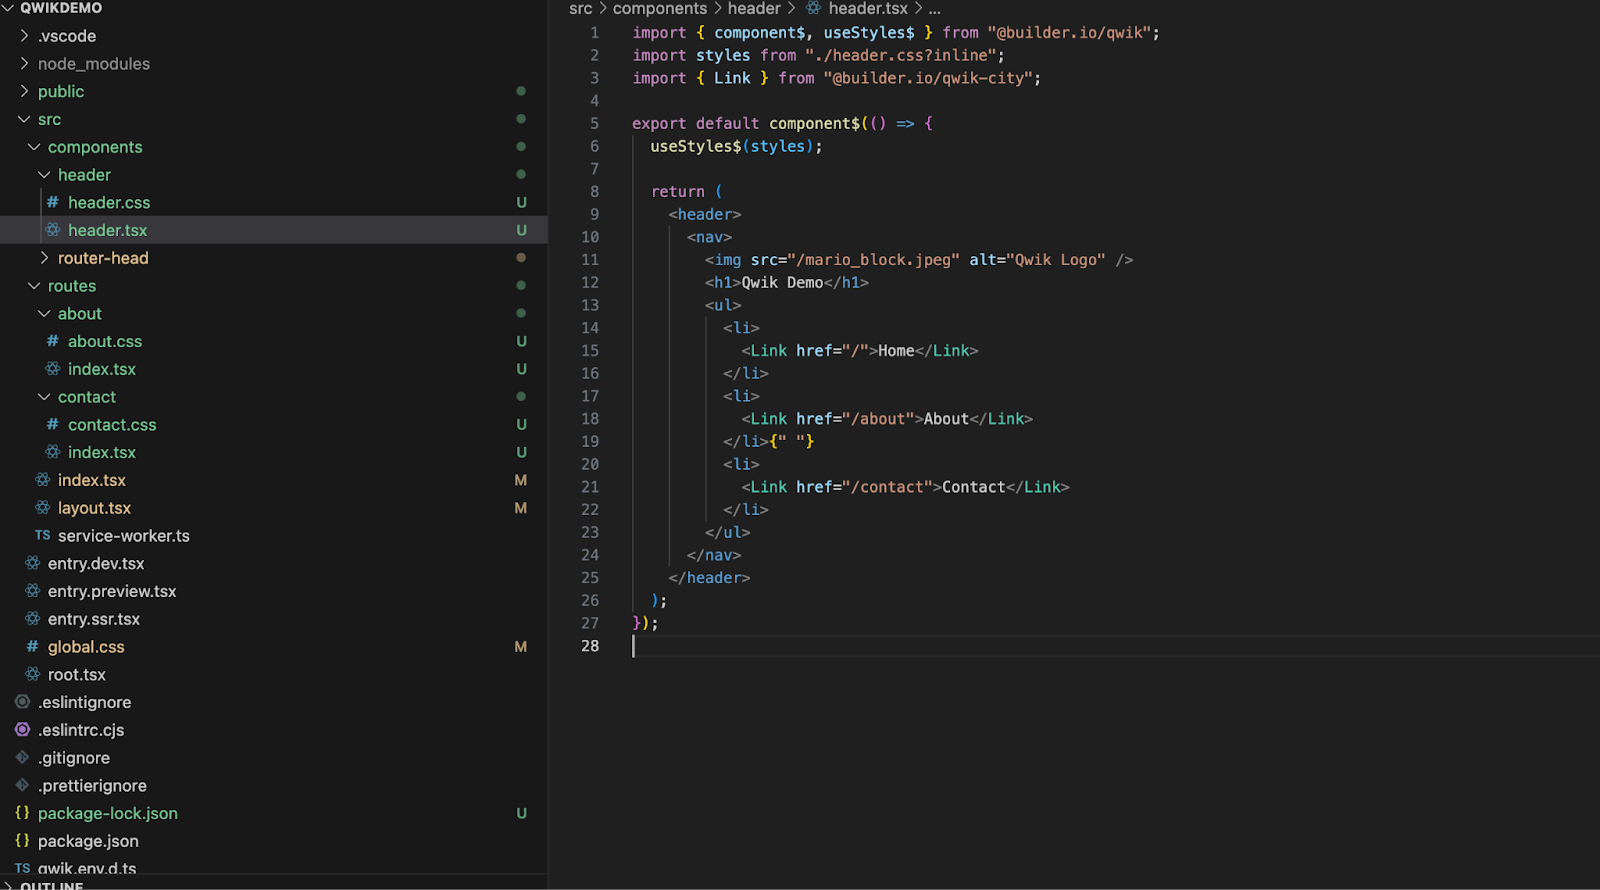
Now add the header folder inside the components folder and add two files “header.tsx” and “header.css”
This is how your “header.tsx” file should look like
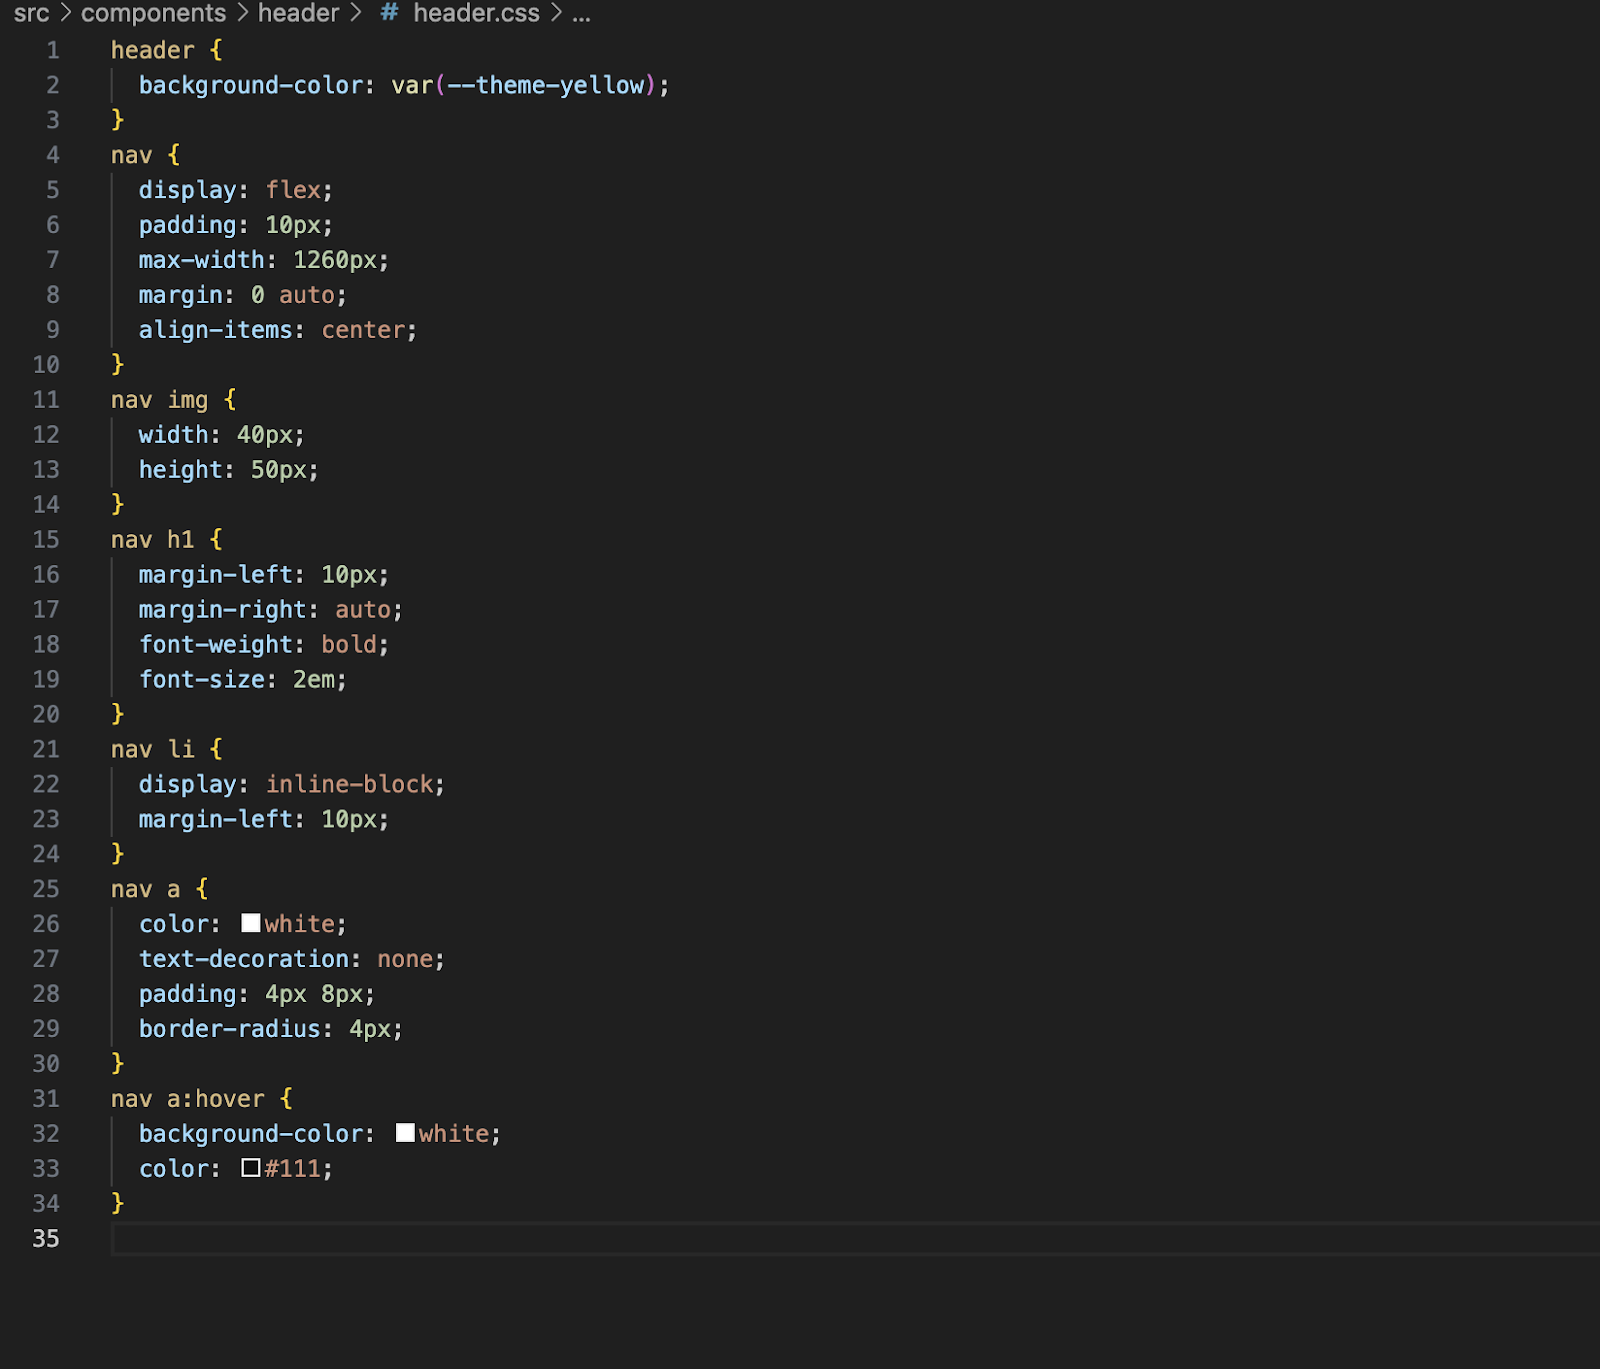
Code for “header.css”
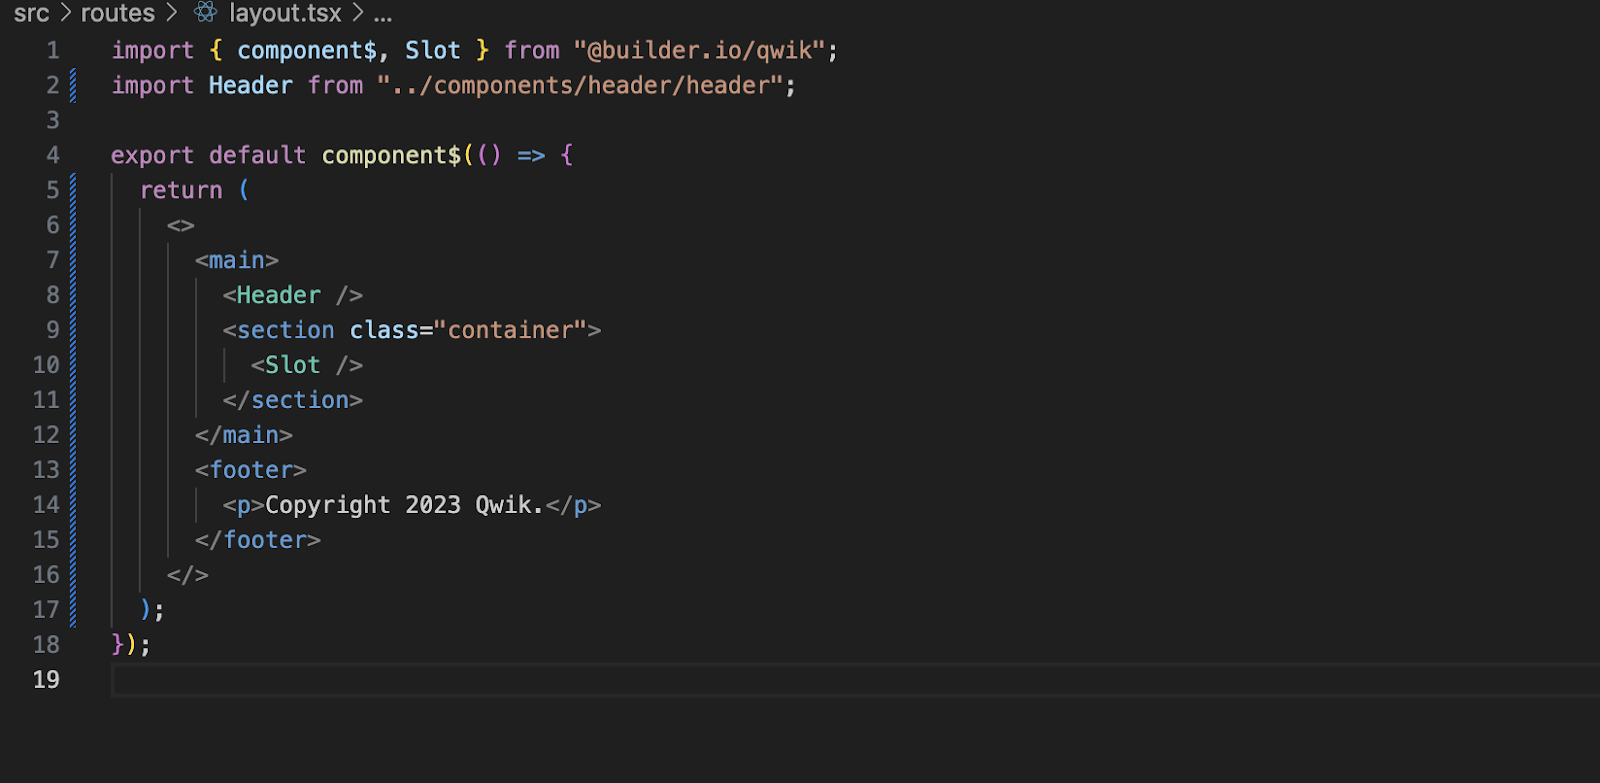
Let’s update the code for “layout.tsx”
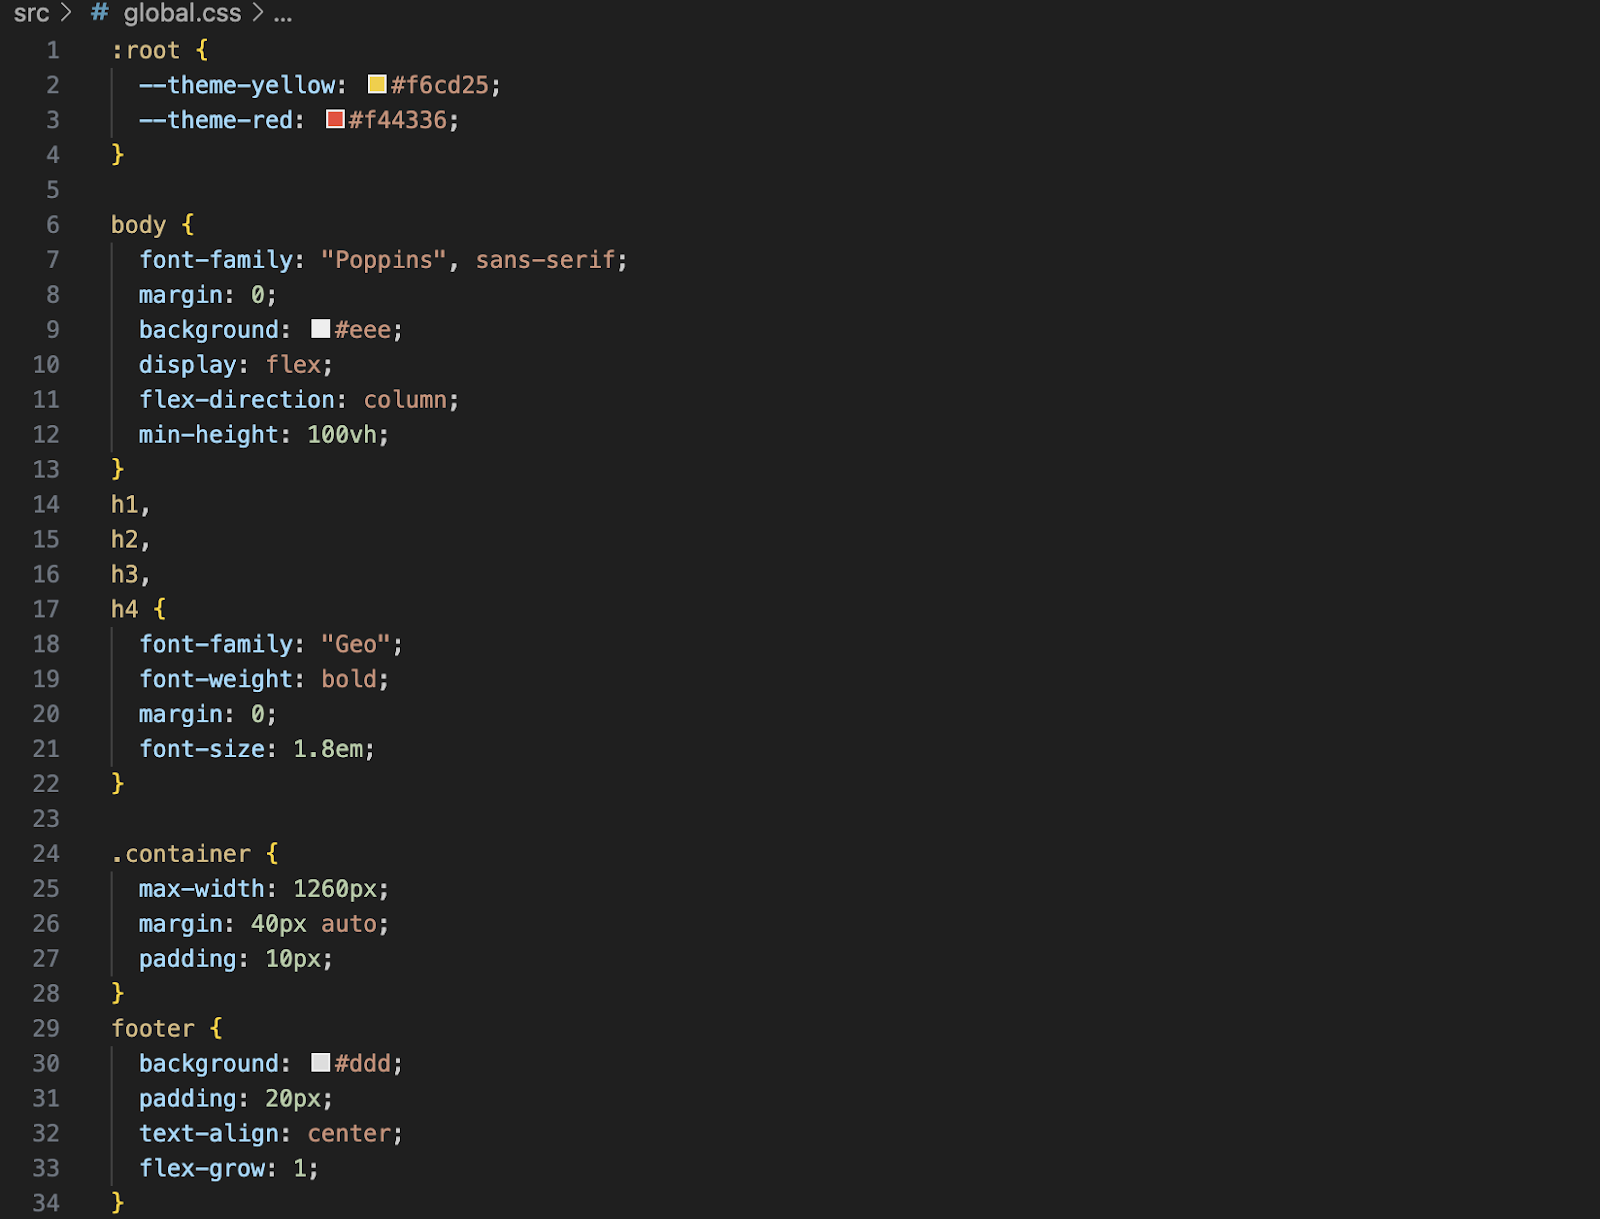
Let’s add some styling in global.css
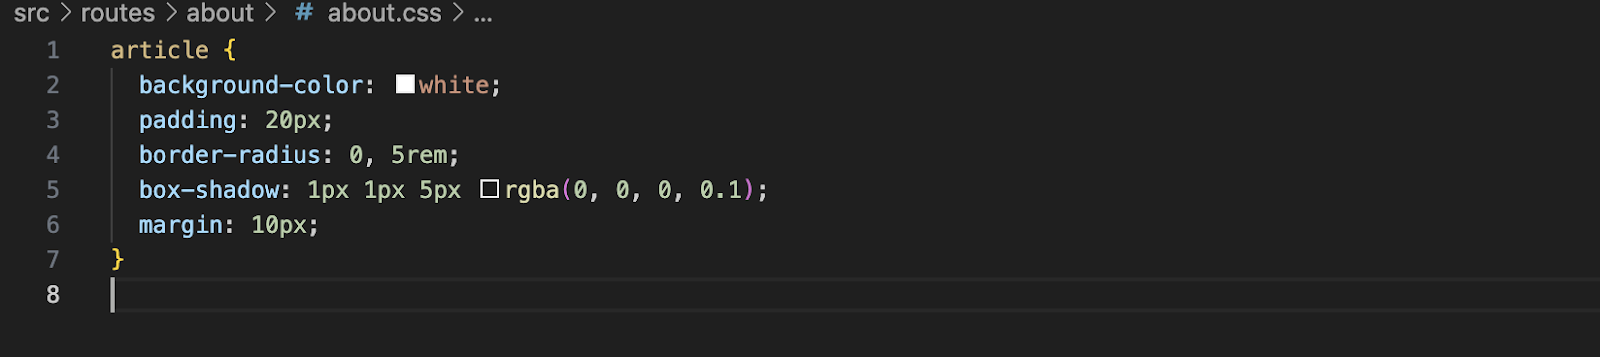
Let’s add some dummy text and styling to about and contact pages
And here is the about.css for about
You can add similar styling for the contact page as well.
Now run your app using the command
npm run devNow when you run your app on the home page you can see your code in action.
You can open the network tab and switch to JS to see the initially loaded JS and you will see that instead of loading all the JS it only loads the necessary ones needed for the home page to work properly.

Now if you click on the “Click me” and “Click me one more time” button you can see the new JS being loaded in the JS tab in the network.
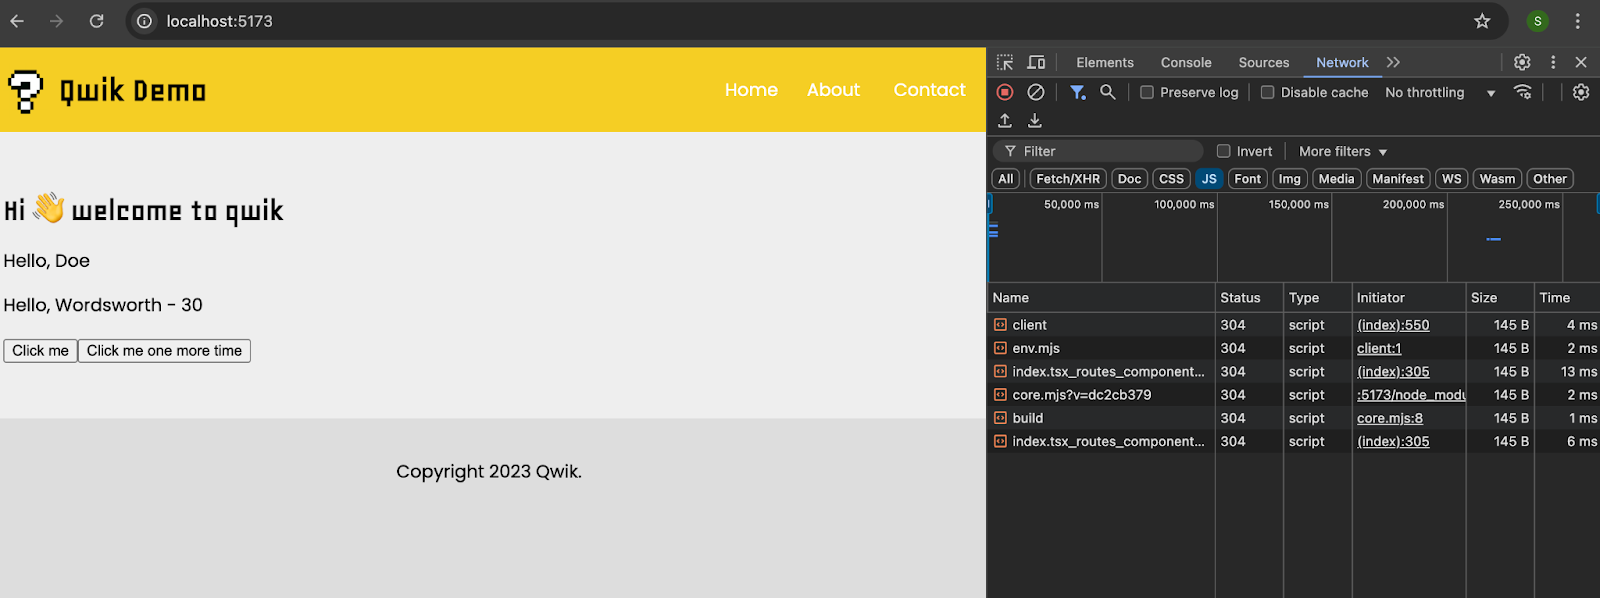
So this was a simple and basic application just to understand how Qwik works behind the scenes to make your application faster and robust by loading files and data in chunks rather than in one go and still keeping the interactivity capabilities of the application intact.
You can further modify the application and experiment with it by exploring the documentation of Qwik.
Copilot Tips for Qwik + React.js Projects
Use Comments to Guide Copilot: Add descriptive comments to your codebase to prompt Copilot to generate contextually relevant suggestions. For example:
- Refactor Code Snippets: Leverage Copilot to refactor repetitive code into reusable functions or components.
- Explore Qwik Patterns: Experiment with Copilot’s ability to generate Qwik-specific patterns like resumable components and event handlers.
- Stay Updated: Keep dependencies up-to-date to ensure Copilot’s suggestions align with the latest framework features.
Conclusion
GitHub Copilot, paired with Qwik and React.js, transforms the development experience by automating repetitive tasks, providing contextual code assistance, and fostering creativity. Whether you’re building a performance-focused web app with Qwik or crafting interactive interfaces with React, Copilot ensures you stay productive and efficient.
Happy Coding!
Read more Shuru tech blogs here